How to Pack a Hiking Backpack Like a Pro in 2025 (Step-by-Step Guide)
Ever started a hike feeling great, only to have your shoulders screaming at you two few kilometers in? I’ve been there!
Here’s a stat that might surprise you: improperly packed backpacks are one of the leading causes of early fatigue and discomfort on the trail, affecting over 60% of novice hikers. The truth is, knowing how to pack a hiking backpack properly can mean the difference between an amazing adventure and a miserable slog back to the trailhead.
Whether you’re planning a quick day hike or a multi-day backpacking expedition, the way you organize and distribute weight in your backpack directly impacts your comfort, balance, and endurance. In this comprehensive guide, I’ll walk you through everything you need to know about packing your hiking backpack the right way—from weight distribution principles to gear organization hacks that’ll make you wonder how you ever hiked without them!
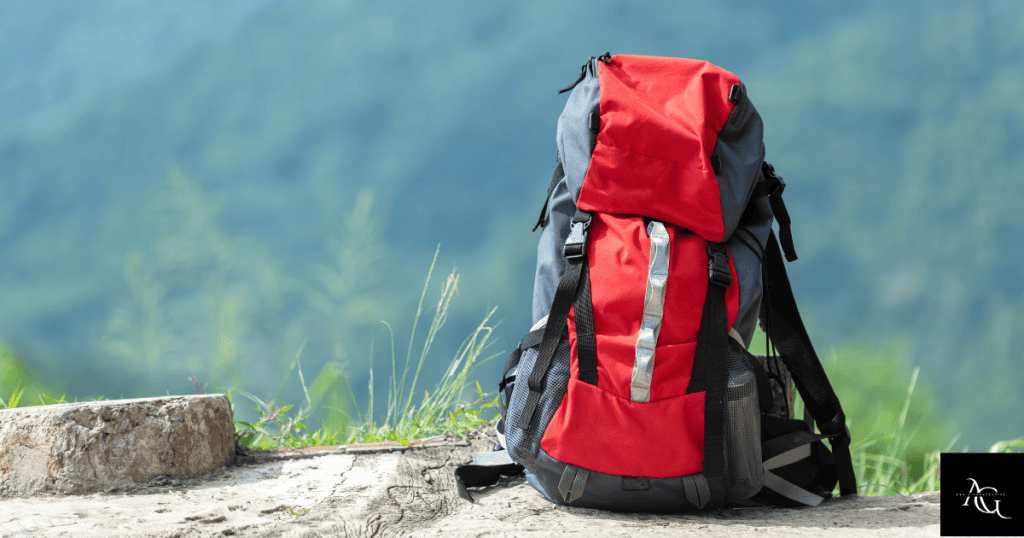
Understanding Backpack Anatomy and Compartments
Look, I’ll be honest with you – I spent my first three hiking trips treating my backpack like one giant stuff sack. Everything just got crammed into the main compartment, and I’d be digging around for my water filter while my hiking buddies waited on the trail. It wasn’t until someone actually showed me what all those pockets and straps were for that things clicked.
The main compartment is where most of your gear lives. You want your sleeping bag at the bottom (it’s the last thing you need at night), your heaviest items like your tent or food bag positioned close to your back in the middle section, and lighter stuff toward the top. I learned this the hard way when I put my cook set at the bottom and my puffy jacket made the pack top-heavy – felt like I was gonna tip backwards on every incline.
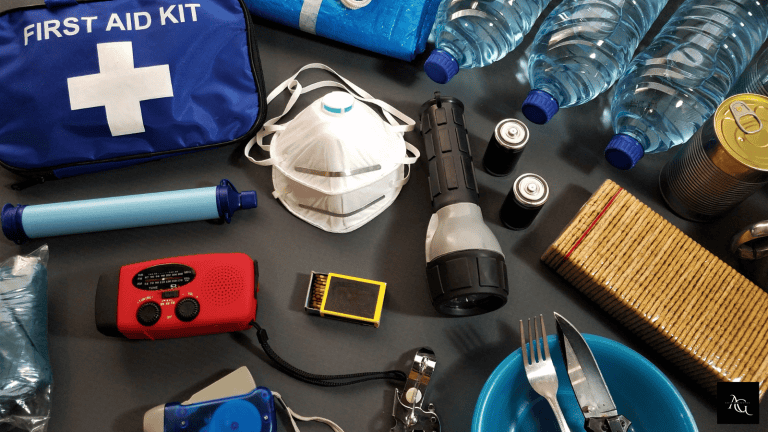
The top lid pocket is seriously underrated. This is where I keep anything I might need without taking off my pack – my headlamp, first aid kit, snacks, and a backup phone charger..
Hip belt pockets are a game changer once you start using them right. I keep my phone, some quick energy, chapstick, and my GPS device there. The key is keeping these pockets light – if you overload them, the hip belt won’t sit right on your hips and you’ll end up with all that weight on your shoulders instead.
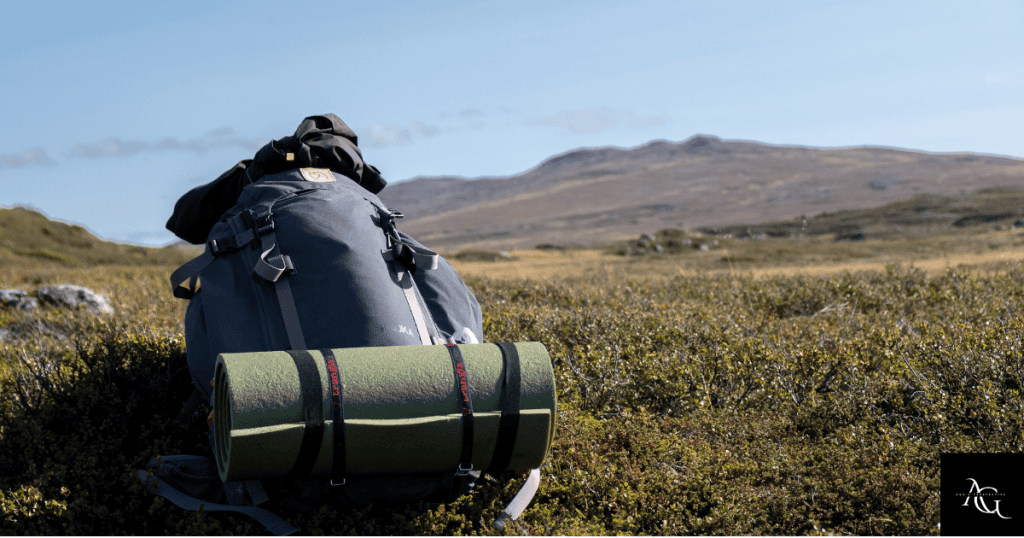
Side pockets and stretch mesh pockets are perfect for water bottles, a wet tent rainfly, or trekking poles when you’re not using them. I usually clip my bear spray to one side too so it’s accessible. One trick I picked up was using a compression strap to secure my foam sleeping pad to the outside – keeps it from getting wet inside and frees up space.
Now, internal frame versus external frame packs – this actually matters more than I thought it would. Internal frame packs hug your body closer, which gives you better balance on technical trails and when you’re scrambling over rocks. External frame packs have that metal frame sticking out, and they’re better for carrying heavier loads on established trails.
Compression straps run along the sides of most packs, and honestly I ignored these for way too long. They cinch down your load so stuff isn’t shifting around while you hike. When your gear’s bouncing around in there, it throws off your center of gravity and makes everything harder.
Load lifters are those angled straps that connect the top of your pack to your shoulder straps. These were confusing to me at first, but they actually help pull the weight forward and keep the pack from pulling you backwards. The proper angle is about 45 degrees when they’re adjusted correctly. Getting this dialed in made a huge difference on longer days – my shoulders weren’t destroyed by mile five anymore.
Understanding all these features isn’t just about being organized. It’s about weight distribution and making your pack work with your body instead of against it. When everything’s in the right spot and adjusted properly, you barely notice you’re carrying 30-40 pounds. When it’s wrong, even 20 pounds feels miserable after an hour.

How to Pack a Hiking Backpack -The Golden Rule of Weight Distribution
I remember my second overnight trip like it was yesterday – mostly because my lower back was screaming at me by fifth kilometer. I had loaded my pack the night before, felt pretty proud of myself for getting everything to fit, and then spent the entire hike feeling like I was being pulled backward off the trail. Turns out, I’d put my tent and all my food at the very top of the pack because, well, that’s where it fit. Big mistake.
Here’s the deal with weight distribution.
Your heaviest items need to be positioned close to your back, centered between your shoulder blades and your waist. Think of it like this – when you carry a toddler, you hold them close to your chest, not with your arms stretched out in front of you. Same concept applies to your backpack.
What happens when you mess this up is your pack starts pulling you in whatever direction the weight is sitting. Heavy stuff at the top? You’re leaning forward all day trying to compensate. I spent one miserable 8-mile day with my water reservoir shoved in the back panel pocket furthest from my body, and my hip flexors were absolutely toast by the end.
The mid-pack zone is your sweet spot for dense, heavy gear. This is where I put my bear canister when I need one, my cook system, food bags, and my water filter setup. Your sleeping bag, puffy jacket, and extra clothes – all that light, compressible stuff – that lives at the bottom and top of your pack.
There’s this thing called the 80/20 rule that one of my hiking partners told me about. About 80% of your pack weight should be in that center zone close to your back, with the remaining 20% distributed at the top and bottom. It’s not like you need to weigh everything and do math or whatever, but it gives you a mental framework.
Your center of gravity shifts based on where weight sits in your pack, and this affects everything about how you hike. If your pack’s center of gravity is too high or too far back, you’re gonna be working way harder on uphills and feeling unstable on technical sections. I learned this the hard way when I kept almost losing my balance while crossing a creek on rocks – my pack weight was all wrong.
The terrain you’re hiking actually changes how you should think about weight placement. For mostly uphill hiking, you want heavy items slightly higher in that mid-pack zone and really snug against your back. This keeps you from feeling like you’re being pulled backwards when you’re climbing.
Downhill is different though. On steep descents, having all your weight up high makes you feel like you’re gonna pitch forward. For trails with significant downhill sections, I shift heavier items slightly lower in the pack – still centered and close to my back, but more toward the bottom of that mid-pack zone.
Back pain and fatigue aren’t just about how much weight you’re carrying – it’s about WHERE that weight is positioned. I used to think I just needed to get stronger or build more endurance, but really I needed to pack smarter. When your heavy gear is sitting away from your back or distributed unevenly, your core and back muscles are constantly engaged trying to stabilize you.
One trick that helped me dial this in was actually loading my pack and then having someone watch me walk around. If you’re leaning to one side or forward or back, something’s off with your weight distribution. You should be able to stand upright naturally without feeling pulled in any direction.
The difference between a properly loaded pack and a poorly loaded one is honestly night and day. Same gear, same total weight, but one feels manageable and the other feels like torture. Getting this right was probably the single biggest improvement to my hiking comfort.
Bottom-layer Strategy
So here’s where most people mess up right from the start – they don’t think about the bottom of their pack as its own strategic zone. I used to just throw whatever fit down there first, and then I’d realize halfway through a hike that I needed something that was buried at the very bottom. Not fun when you’re standing in the rain trying to dig out your water filter.
The sleeping bag is the king of the bottom compartment. It’s bulky, it’s one of the lighter items in your pack, and you literally don’t need it until you’re setting up camp at the end of the day. Most modern packs have a separate sleeping bag compartment with its own zipper access at the bottom, which is clutch. If your pack doesn’t have this, just stuff your sleeping bag in first before anything else goes in.
I learned pretty quick that compression is your friend down here. A lot of people don’t compress their sleeping bags enough because they’re worried about damaging the insulation or whatever. But here’s the thing – your sleeping bag is designed to be compressed during transport. I use a compression sack and can usually get my 20-degree bag down to about the size of a basketball. That frees up so much room for the rest of your gear.
Your sleep clothes and extra base layers can go at the bottom too. Stuff them around your sleeping bag to fill in any gaps and create a more stable base. I usually shove my camp sandals or extra socks down there as well. Basically anything you only need at camp and not on the trail belongs in this bottom zone.
One mistake I made early on was putting my tent at the bottom because it seemed logical – like, I need it at camp so it can live with the sleeping bag, right? Wrong. Your tent is usually one of your heavier items, and remember that weight distribution rule we talked about? Heavy stuff needs to be mid-pack, not at the bottom. Plus, if it rains during the day, your tent might be wet when you pack up in the morning, and you don’t want that moisture seeping into your sleeping bag.
The bottom layer should create a stable foundation without adding much weight down low. Think of it like building a house – you want a solid base, but you don’t want all the heavy stuff in the basement throwing off the structure. Light and compressible is the name of the game here.
Here’s a pro tip that took me forever to figure out. If you’re using a pack liner or trash compactor bag (which you should be for waterproofing), put it in first and then load your sleeping bag and other bottom-layer items inside it. This keeps everything dry even if your pack gets soaked. I learned this after a stream crossing went sideways and my supposedly water-resistant pack let water seep in through the bottom panel.
Some people like to keep their insulated jacket at the bottom since it’s light and compresses well. I go back and forth on this one. If it’s gonna be a cold morning and I might need my puffy early in the hike, I’ll put it in the top lid instead. But on warmer trips, yeah, it goes at the bottom with my sleeping bag.
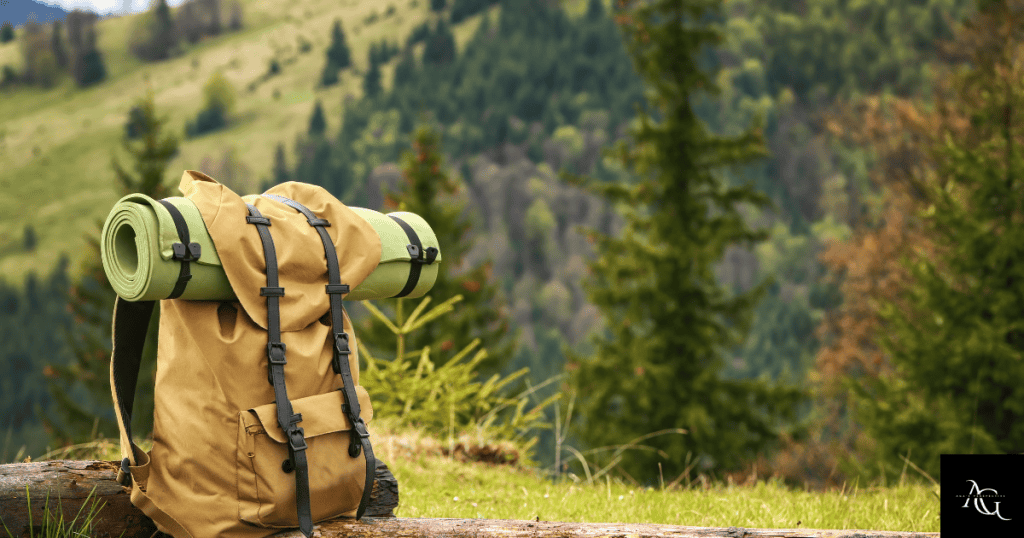
The sleeping pad situation depends on what kind you have. Foam pads like the Z-Lite usually get strapped to the outside of your pack because they don’t compress. Inflatable pads are small enough that they can go basically anywhere, but I often toss mine at the bottom too since I only need it at camp. Just make sure it’s in a stuff sack or protected somehow – puncturing your sleeping pad on day one of a five-day trip is a special kind of misery.
Getting your bottom layer right sets you up for success with the rest of your packing. If this foundation is sloppy or poorly organized, everything else suffers. Take an extra five minutes to do it right, and I promise your back will thank you later.
Middle Layer: The Heavy Hitters
Alright, this is where the magic happens – or where everything goes wrong if you’re not careful. The middle section of your pack is prime real estate, and it’s where all your heaviest gear needs to live. I can’t tell you how many times I’ve seen people at trailheads with their pack loaded backwards, heavy stuff at the top and bottom, and then they’re struggling a mile in.
Your food is probably the heaviest thing you’re carrying, especially on longer trips. A five-day food supply can easily hit 10-12 pounds, and that needs to be positioned right against your back in the middle zone. I use a bear canister on a lot of my trips, and that thing is dense and awkward. It goes right in the center of the pack, as close to my spine as possible, sitting between my shoulder blades and waist.
The cook system is another heavy hitter that belongs here. Your stove, fuel canister, pot, and all that stuff adds up quick. I keep mine in a stuff sack and wedge it in next to my food bag. Some people put their fuel canister in a side pocket for safety reasons, which is fine, but I personally keep everything centralized in the middle.
Water is tricky because it’s heavy but you need access to it. If you’re carrying extra water for a dry stretch – like those 2-liter bottles or a hydration bladder that’s full – that weight needs to be managed carefully. I position my hydration reservoir against the back panel in that middle section, and any extra water bottles go in the main compartment close to center. Never, and I mean never, put heavy water bottles in your outer pockets if you can avoid it. That weight hanging off the sides of your pack will throw off your balance big time.
Your tent body (not the rainfly or stakes, just the actual tent) usually has some decent weight to it. This goes in the middle layer too, packed tight against your back. I learned this after carrying my tent strapped to the outside of my pack for a whole season like some kind of rookie. Once I moved it inside to the center zone, the difference in pack stability was immediately obvious.
Here’s something that took me a while to figure out – you gotta think about the shape of your heavy items and how they nest together. A bear canister is a cylinder, so there’s dead space around it. I fill that space with my food bags, stuff sacks, or even my rain jacket if it fits. You’re trying to create a solid, compact core in the middle of your pack without wasting space.
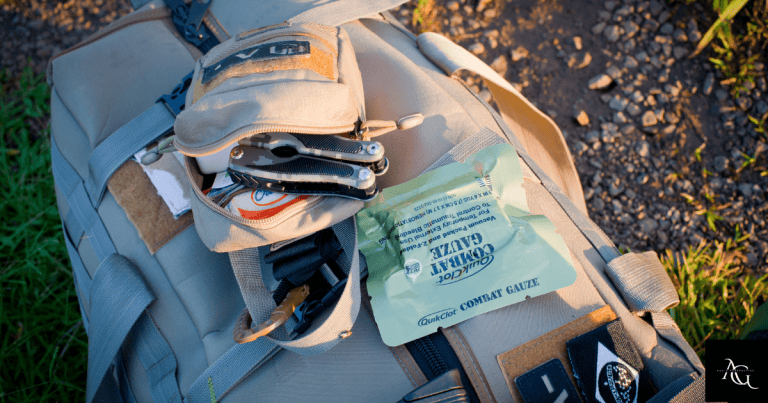
The first aid kit is another item that’s got some weight and should live in the middle section. Mine’s in a dry bag and weighs about a pound and a half. It’s not critical that I access it constantly, so it can be buried in the center with everything else. Same goes for my repair kit and any electronics like battery banks or satellite communicators.
One thing I got wrong for way too long was trying to keep everything I might need during the day easily accessible. That meant I was putting heavier items toward the outside of the pack or in pockets where I could grab them quick. But your pack works better when the heavy stuff is centered, even if it’s slightly less convenient. I just plan my breaks better now – if I need to get into my food bag, I take off my pack and do it properly instead of trying to reach around while it’s still on my back.
The density of this middle layer is what makes or breaks your pack’s performance. When it’s loaded right, you feel balanced and stable. When it’s wrong, you’re fighting your pack all day. I’ve done 15-mile days where my pack felt like it was working with me, and other days where the same weight felt like I was dragging an anchor. The only difference was how I packed that middle section.
If you’re not sure if you’ve got it right, here’s a quick test. Load your pack, put it on, and stand up straight without holding onto anything. You shouldn’t feel pulled backward, forward, or to either side. If you do, something’s off with your middle layer weight distribution. Adjust until you feel neutral.
Top Layer and Accessibility
The top of your pack is for stuff you actually need during the day, and it took me way too long to understand this. I used to fill the top section with whatever was left over after packing everything else, which meant I’d be stopping every hour to dig through my entire pack looking for my sunscreen or snacks. Not the smartest move.
Your rain jacket needs to be at the top or in the top lid pocket. Weather changes fast in the mountains, and the last thing you want is to unpack half your gear in a sudden downpour just to find your rain layer. I keep mine in a small stuff sack right at the very top of the main compartment where I can grab it in like ten seconds.
Extra layers that you might need during the day go up here too. If you’re starting a hike early in the morning when it’s cold but you know it’ll warm up, your midweight fleece or wind jacket should be easily accessible at the top. I usually hike in just a base layer and keep my insulating layer at the top until we stop for lunch or I hit elevation where it gets colder.
The top lid pocket is seriously the MVP of accessibility. This is where I keep my headlamp, because you never know when you might need it – maybe you’re running behind schedule or you want to check something in your pack when it’s getting dark. My sunglasses go here too, along with lip balm, sunscreen, and bug spray. Basically anything small that I need regularly throughout the day.
Snacks and quick energy need to be accessible, but here’s where I differ from some people. I don’t keep all my food at the top – remember, the bulk of your food weight belongs in the middle section. But I do keep my trail snacks for the day in the top lid or hip belt pockets. Usually some bars, jerky, or whatever I’m gonna munch on without stopping.
Your map, compass, and any navigation stuff should be easy to grab. I keep mine in the top lid in a small waterproof pouch. Even though I use my phone for GPS most of the time, having the paper map accessible is important for those moments when you need to check something quick without digging around.
One mistake I see people make is overloading the top of their pack with too much weight. Yeah, accessibility is important, but if you stack a bunch of heavy items up top, you’re gonna feel top-heavy and unstable. The top layer should be lighter stuff – we’re talking maybe 10-15% of your total pack weight at most.
Toilet paper and a trowel go in my top lid too, because nature calls when it calls and you don’t wanna be that person frantically searching through their pack in an emergency situation. Trust me on this one. I also keep hand sanitizer up there for obvious reasons.
If you’re carrying a water filter or purification tablets, think about where makes sense. I used to keep mine at the bottom with my sleeping bag, which was dumb because I needed it multiple times a day. Now it lives at the top or in an outer pocket where I can access it when I’m filtering water at a stream.
The stuff sacks and dry bags you use can actually help with organization up here. I color-code mine – like my red dry bag is always my rain gear, blue is extra layers, whatever. It sounds nerdy but when you’re tired and just want to grab something quick, those little systems make life easier.
Here’s a trick I learned from a thru-hiker – pack your top layer in reverse order of when you’ll need things. So if you know you’re gonna want your rain jacket first, it goes on the very top. Then your snacks, then maybe a warmer layer underneath that. It’s like thinking through your day before it happens.
The balance between accessibility and proper weight distribution is tricky. You want important stuff within reach, but you can’t sacrifice your pack’s stability for convenience. I try to keep the critical items – rain gear, first aid, navigation, snacks – accessible while making sure they’re not adding weird weight to the top of my pack. Light and frequently used, that’s the rule for the top layer.

Utilizing External Attachment Points
For the longest time, I thought all those loops, straps, and daisy chains on the outside of my pack were just for looks or something. Like maybe they were there for extreme mountaineering that I’d never do. Turns out, using your pack’s external attachment points correctly can free up a ton of interior space and make certain gear way more accessible.
Trekking poles are the obvious one. Most packs have loops at the bottom and elastic holders or straps higher up specifically designed for poles. When you’re not using them – like when you hit a flat section or you’re scrambling with your hands – you can stash them on the outside in seconds. I used to try cramming my poles inside my pack, and it was just awkward and took up room that could’ve been used better.
The ice axe loop is another feature that’s super useful even if you’re not doing technical climbing. I’ve used mine to attach all kinds of stuff – a foam sleeping pad rolled up, extra tent stakes in a bag, even my camp chair on one trip. Just make sure whatever you attach is secured properly and not gonna swing around or fall off.
Compression straps aren’t just for compressing your load. You can thread all sorts of gear through them. I often attach my sleeping pad to the outside using the side compression straps, especially if it’s a bulky foam pad like a Z-Lite. It keeps the pad dry, saves interior space, and honestly doesn’t affect my pack’s balance much since foam pads are so light.
Here’s where I messed up early on – I started attaching everything to the outside of my pack because it seemed convenient. Heavy water bottles hanging off the sides, my cook pot dangling from a carabiner, tent poles strapped to the outside. My pack looked like a yard sale and I was constantly snagging on branches. Plus all that external weight was throwing off my balance on technical terrain.
The rule I follow now is pretty simple. Only put lightweight or bulky items on the outside, and only stuff you might need quick access to or that doesn’t fit well inside. Wet gear is also fair game for external attachment – like if I pack up a wet tent in the morning, sometimes I’ll strap the rainfly to the outside so it can dry while I hike.
Water bottle pockets on the sides are designed for, well, water bottles. But they’re also perfect for things like a camp towel, wet socks you want to dry out, or even trekking pole tips if you removed them for some reason. I keep one water bottle in a side pocket and my bear spray in the other where I can grab it fast if needed.
The top of your pack usually has a handle or grab loop, and some packs have additional attachment points up there. I clip my sunglasses to a loop up top when I’m not wearing them, so they don’t get crushed inside my pack. Just make sure nothing you attach up there is gonna smack you in the head when you’re hiking.
Bungee cords on the front of some packs are clutch for stuffing a rain jacket or wind layer when you take it off during the day. Instead of stopping to open your whole pack, you can just shove it under the bungees and keep moving. It’s not the most organized system, but on those days when the weather keeps changing, it’s super practical.
One thing to watch out for is noise. If you’ve got metal carabiners clinking against each other or stuff bouncing around on the outside of your pack, it gets annoying real fast. And if you’re trying to see wildlife, all that noise isn’t doing you any favors. I try to minimize metal-on-metal contact and make sure external attachments are cinched down tight.
Daisy chains and MOLLE webbing on some packs let you attach all kinds of pouches and accessories. I added a small external pocket to mine for my phone and GPS, which has been awesome. Just don’t go overboard – I’ve seen people with so much stuff attached to the outside that their pack looks like a military rig. Keep it simple.
The bottom line is external attachment points are super useful, but they’re not an excuse for sloppy packing. Use them strategically for the right gear, and you’ll have a more organized and accessible setup. Overuse them with heavy items or too much stuff, and you’ll end up with an unbalanced mess that catches on everything.

Hip Belt and Shoulder Strap Pocket Organization
The key thing with hip belt pockets is keeping them light and balanced. I learned this the hard way when I stuffed one side with my phone, GPS, and a bunch of energy gels, and left the other side almost empty. My hip belt was sitting crooked on my hips within an hour, and all that pack weight shifted onto my shoulders. Not fun.
What goes in my hip belt pockets? Phone in one side, always. It’s my camera, my navigation backup, and my emergency device all in one. I keep it in a small ziplock bag for extra water protection. The other side gets my daily snacks – usually a couple bars or a bag of trail mix that I’m gonna eat throughout the day. Both pockets also have chapstick and sunscreen because I use those constantly.
Some people keep their headlamp in a hip belt pocket, which makes sense if you’re worried about getting caught out after dark. I tried it but found it got in the way when I was sitting down for breaks. Now I keep mine in the top lid instead, but there’s no wrong answer here – it’s about what works for your hiking style.
The GPS or satellite communicator is another good candidate for hip belt pockets. Mine’s an InReach, and it lives in my right hip belt pocket where I can check it easily. It’s light enough that it doesn’t throw off my balance, and I like being able to send check-in messages without unpacking anything.
Here’s what doesn’t belong in hip belt pockets – anything heavy or bulky. I made the mistake of putting a full water bottle in there once, and it was just uncomfortable and weird. The hip belt is meant to transfer pack weight to your hips, and when you load up the pockets too much, it interferes with that function. Keep it under half a pound per pocket if possible.
Bear spray is something I go back and forth on. Some people clip it to their hip belt for quick access, which makes sense in grizzly country. I usually keep mine on a side compression strap instead because it’s kinda bulky and I don’t want it pressing against my hip all day. But if you’re in an area with lots of bear activity, having it on your hip belt might be worth the slight discomfort.
Shoulder strap pockets are a newer thing on a lot of packs, and honestly I didn’t think I’d use them much. Boy was I wrong. These little pockets are perfect for stuff you need constant access to – like energy chews during a tough climb or your lip balm when the wind picks up. They’re right there at chest level, super easy to reach even with your pack on.
I keep my backup lighter and some emergency fire starter in one shoulder strap pocket. It weighs almost nothing, and I never need to dig for it if something goes sideways. The other shoulder strap pocket usually has whatever I’m snacking on right at that moment – like if I opened a bag of gummy bears, that’s where it lives until it’s gone.
The thing about shoulder strap pockets is they’re small, so you gotta be selective. This isn’t the place for your whole first aid kit or a bunch of random gear. Think tiny and essential. Some people keep electrolyte tabs there, which is smart if you’re adding them to your water throughout the day.
One trick I picked up is using hip belt and shoulder strap pockets for “active items” – stuff you’re using during the current stretch of trail. So when I stop for lunch, I might move my afternoon snacks from my main pack to my hip belt pockets. Or if I know I’m gonna be in full sun for the next few hours, I’ll put my sunscreen in a shoulder strap pocket for easy reapplication.
Weight distribution matters even with these small pockets. If your shoulder strap pockets are stuffed full and heavy on one side, it can actually pull your shoulder strap off-center and create pressure points. Keep them balanced and light, and you won’t have issues.
The worst thing you can do is ignore these pockets completely. They’re designed to make your life easier on the trail, and when you use them right, you’ll find yourself stopping way less often and getting into a better hiking rhythm. Small gear in small pockets, balanced on both sides, stuff you actually need during the day. That’s the formula.
Conclusion
Mastering how to pack a hiking backpack isn’t just about stuffing everything inside and hoping for the best—it’s a skill that transforms your entire hiking experience! By following the weight distribution principles we’ve covered, organizing your gear strategically, and avoiding those common rookie mistakes, you’ll hit the trail feeling balanced, comfortable, and ready for anything.
Remember, the best packing system is one that works for YOUR body and YOUR adventure style, so don’t be afraid to experiment and make adjustments. Start with these proven techniques, practice at home before your next trip, and pay attention to how your pack feels on the trail. Your shoulders (and your entire body) will thank you! Now get out there and put these packing skills to work—adventure awaits!