What to Pack in a Hiking First Aid Kit? (Most Get This Wrong)
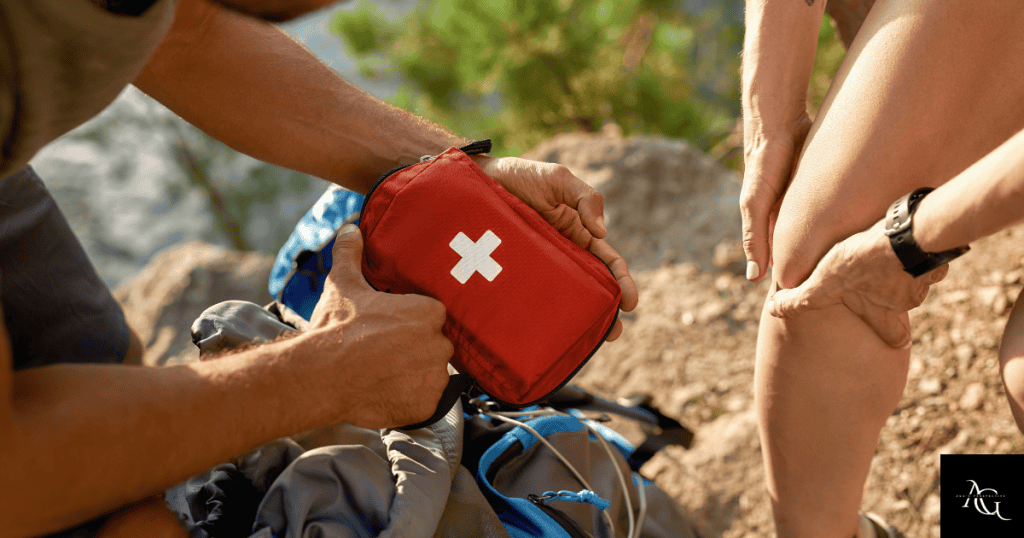
Ever been miles deep into the backcountry when someone twisted an ankle or got stung by a wasp? I have. And let me tell you—that’s when you realize your first aid kit isn’t just extra weight in your pack. It is essential for any hike.
Here’s the thing: not all first aid kits are created equal. What works for a casual day hike differs dramatically from what you need for multi-day backcountry adventures. That little first aid kit from your bathroom medicine cabinet? Yeah, that’s not gonna cut it when you’re five hours from the trailhead.
I learned this the hard way on a three-day trip to Algonquin Park. Grabbed my basic home kit, figured I was all set, and quickly realized I was woefully unprepared when my friend twisted his ankle on day one.
Let’s make sure you’re prepared for whatever the trails throw your way.

Why Hiking First Aid Kits Differ from Regular Kits
I learned this lesson the hard way on a trip to Algonquin Park back in 2019. Grabbed the first aid kit from under my bathroom sink—you know, the one with cartoon bandages and expired Tylenol—and figured I was all set for three days of backpacking.
Yeah, that was stupid.
Here’s the thing about that little plastic box living in your medicine cabinet: it’s designed for everyday boo-boos. Paper cuts. Minor cooking burns. Maybe a headache after too much coffee. The entire concept assumes that if things go sideways, you’re calling 911 and an ambulance shows up in ten minutes.
But when you’re five hours deep into the backcountry? That assumption falls apart real quick.
The wilderness changes everything. You become the ambulance, the emergency room, and the pharmacy all rolled into one sweaty, potentially panicked hiker. My buddy twisted his ankle pretty badly on day two of that Algonquin trip. I’m standing there looking at my pathetic kit with three band-aids and some antiseptic wipes, thinking “well, this is useless.”
Distance from help is the biggest game-changer. In the city, professional medical care is minutes away. On trails? You might be looking at hours. Sometimes days. That completely shifts what you need to carry and what skills you need to have.
So what injuries actually happen out there? Here’s what I’ve dealt with or seen:
- Blisters (like, 80% of hikers get them)
- Sprains and strains from uneven terrain
- Cuts and scrapes from falls
- Insect bites—those black flies are brutal
- Occasional allergic reactions
- Heat exhaustion
- Mild hypothermia
- One scary wasp sting situation
Your home first aid kit isn’t stocked for any of that wilderness stuff. No moleskin for blisters. No tensor bandages for rolled ankles. No tick removal tools. Mine definitely didn’t have an emergency blanket for when temperatures dropped way faster than expected that first night.
Weight matters too. Sounds backwards, right? More supplies should equal better preparedness. But when you’re carrying everything on your back for miles, every ounce counts. A hiking first aid kit needs to be strategic—lighter, more compact, but actually more comprehensive in the areas that matter.
Self-sufficiency becomes absolutely critical. There’s no running to the pharmacy if you forget something. What you pack is what you’ve got. Period.
Bottom line? Your home first aid kit is designed for convenience and immediate professional backup. Your hiking first aid kit is designed for self-reliant emergency care in challenging environments where help isn’t coming anytime soon. They serve completely different purposes, and treating them as interchangeable could literally put lives at risk.
Trust me on this one—I’ve been there, felt that panic, and now I pack properly every single time.
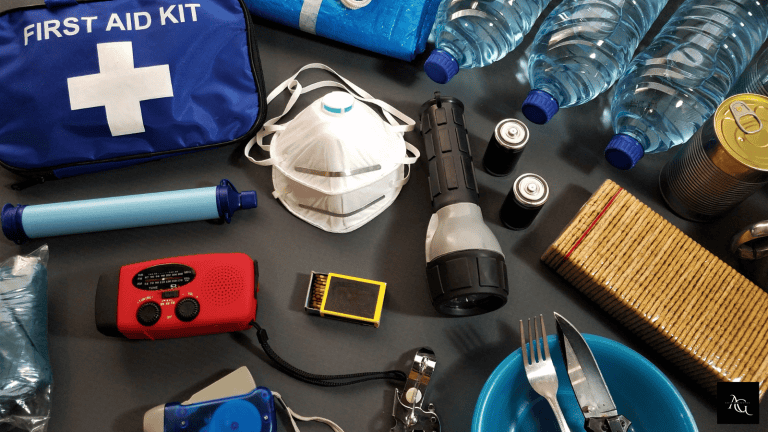
The 10 Must-Have Categories for Your Hiking First Aid Kit
After my embarrassing under-prepared experience, I completely rebuilt my hiking first aid kit from scratch. And let me tell you, it was overwhelming at first.
I stood in the first aid aisle at Shoppers Drug Mart for like 45 minutes just staring at options. Totally paralyzed by choice.
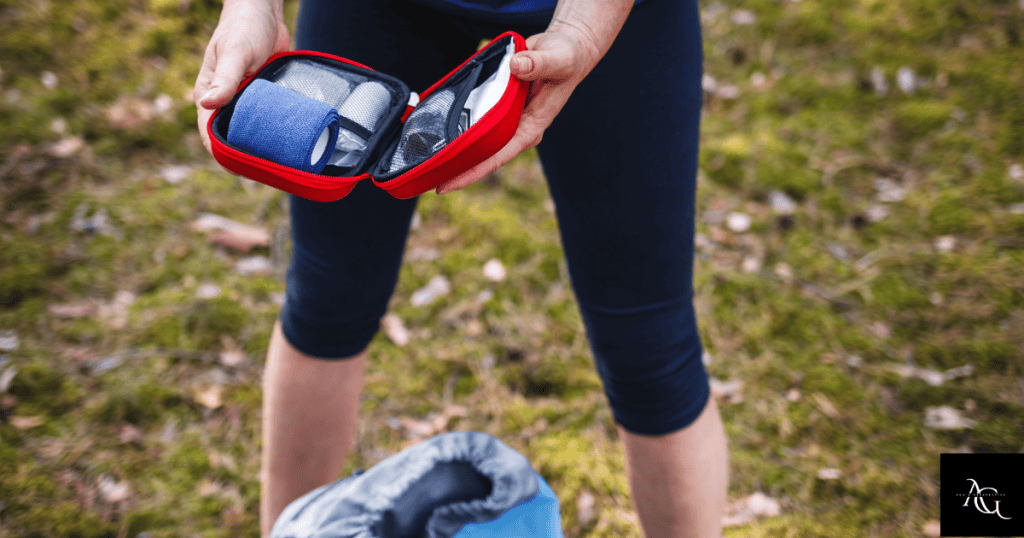
What helped? Breaking everything down into categories instead of randomly grabbing supplies. Now I organize my kit into ten essential categories, and it makes packing, restocking, and actually finding things during emergencies so much easier.
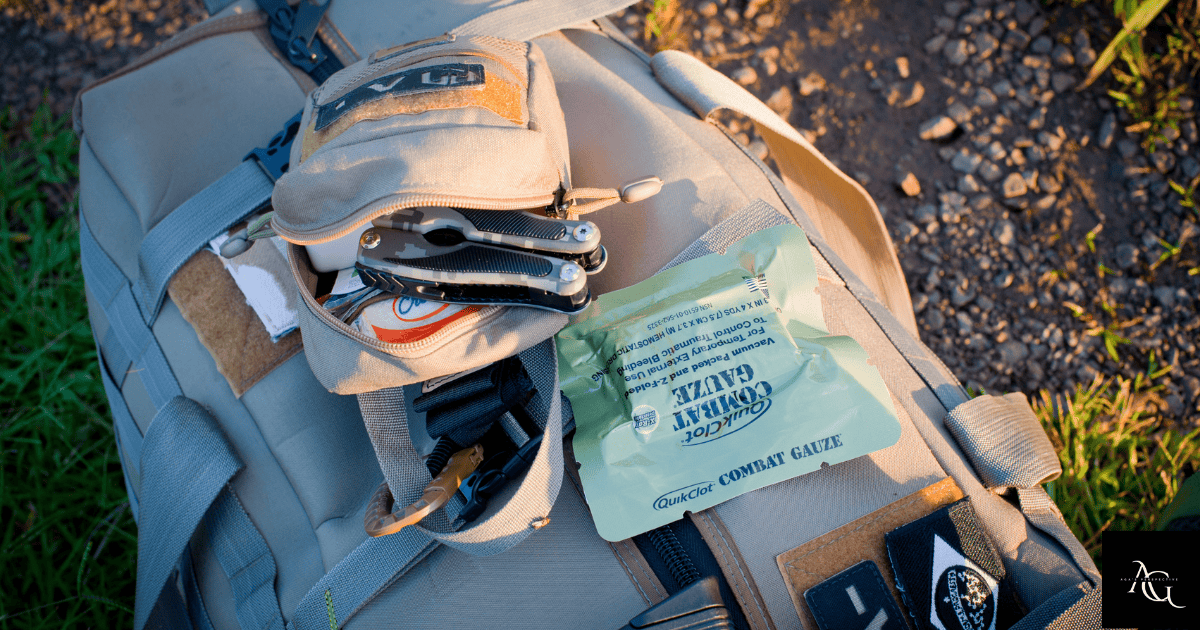
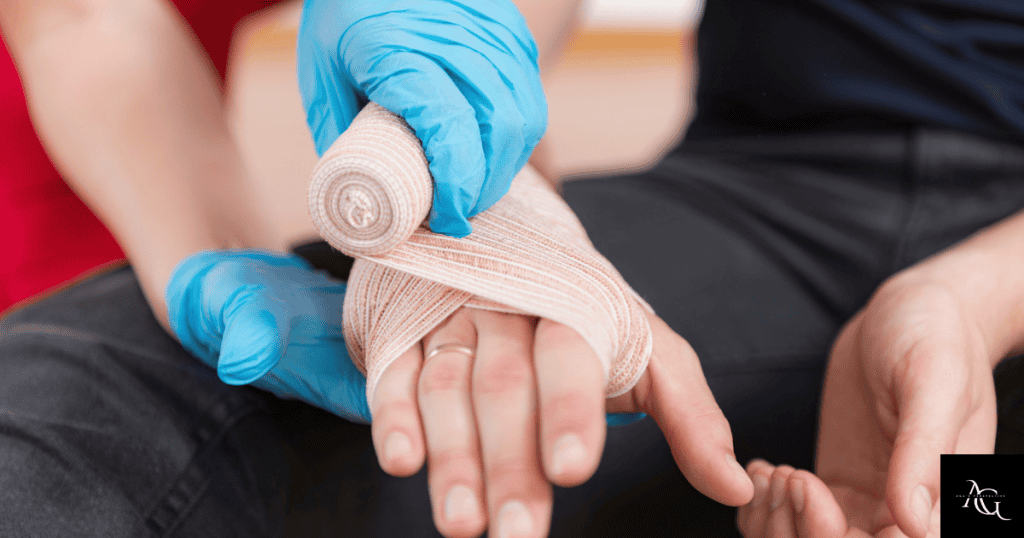
1. Wound Care Supplies (Your Foundation)
This is the stuff you’ll use most often—guaranteed.
What I keep:
- Various sizes of adhesive bandages (not just the tiny ones!)
- Sterile gauze pads in 2×2 and 4×4 sizes
- Rolled gauze for wrapping
- Medical tape that actually sticks when you’re sweaty
- Antiseptic wipes and alcohol prep pads
The key? Variety in sizes. That little cut on your finger needs different supplies than a scraped knee or a gash on someone’s shin.
2. Blister Prevention and Treatment
Honestly, this is the injury you’re most likely to actually deal with. I can’t even count how many times I’ve stopped mid-hike to patch up hot spots.
My kit always has:
- Moleskin (the felt-like material you cut to size)
- Modern blister bandages like Band-Aid’s hydrocolloid ones
- Leukotape—it’s like the duct tape of blister prevention
Pro tip? Bring way more blister supplies than you think you need.
3. Medications
This is tricky because everyone’s needs differ, but there are some basics:
- Pain relievers: ibuprofen (for inflammation) and acetaminophen (for different pain types)
- Antihistamines like Benadryl or Reactine for allergic reactions
- Anti-diarrheal medication (stomach issues on the trail are nobody’s idea of fun)
- Antacids for digestive problems
- Electrolyte replacement tablets—they’ve saved me multiple times
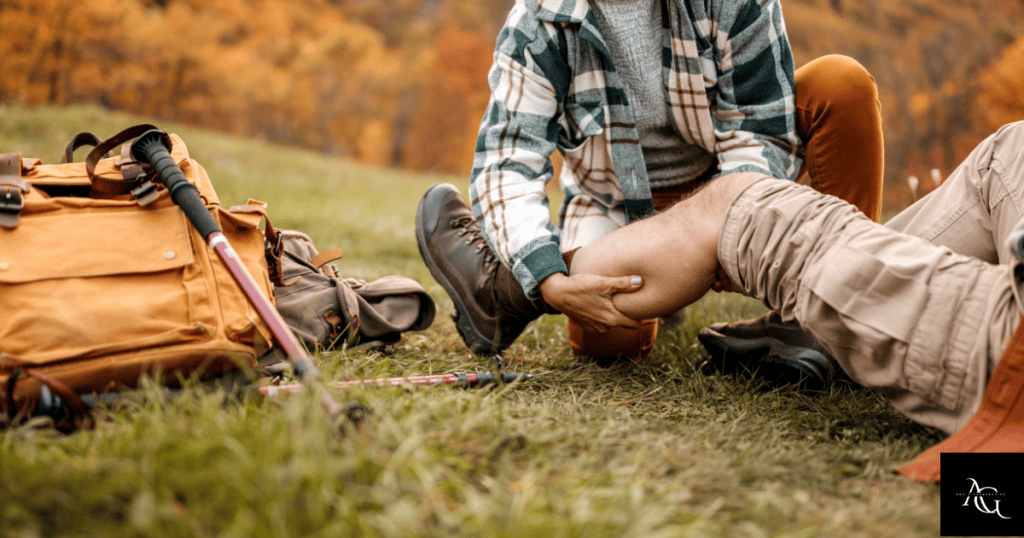
4. Sprains and Strains Supplies
Saved my butt (well, actually my friend’s ankle) on that Algonquin trip.
Now I always pack:
- Elastic tensor bandages in at least two widths
- Triangular bandages that can work as slings or for immobilization
- Athletic tape for joint support
- An instant cold pack (worth the weight!)
The thing about musculoskeletal injuries? They’re super common on trails with uneven terrain, water crossings, or steep descents. One wrong step and suddenly someone needs support to even continue hiking.
5. Tools and Instruments
Might seem basic but they’re essential:
- Good scissors that can cut through tape, clothing, and moleskin without struggling
- Tweezers for splinters, ticks, or debris in wounds
- Safety pins for securing bandages or improvising gear repairs
- CPR face shield (takes up almost no space)
Make sure your scissors are actually sharp. I once had a pair that could barely cut gauze. Pretty useless in an emergency!
6. Insect and Allergy Supplies
Non-negotiable in Canada. Our bugs are brutal, especially black flies and mosquitoes during peak season.
I carry:
- Insect repellent with DEET or Icaridin (the Canadian-approved stuff)
- After-bite treatment for when the bugs win anyway
- Extra antihistamines
- EpiPen if anyone in your group has severe allergies (literally life-saving)
- Tick removal tools for Lyme disease areas
7. Protective Items
Keep you safe while treating others:
- Nitrile gloves (at least four pairs in my kit)
- Antiseptic ointment like Polysporin
I prefer nitrile over latex because some people have latex allergies, and nitrile gloves hold up better in wet or rough conditions.
8. Specialized Items
Round out a solid wilderness kit:
- Emergency blanket (those shiny mylar ones weigh almost nothing but can prevent hypothermia)
- Instant cold packs for injuries when you can’t access actual ice
- Irrigation syringe for flushing out wounds—game-changer when I had to clean out a deep cut with dirt embedded in it
9. Personal Medications
Whatever you specifically need:
- Prescription drugs you take regularly, plus extras in case you’re delayed
- Any vitamins you’re taking
- Medication for pre-existing conditions (asthma inhaler, diabetes supplies, etc.)
Make sure everything is clearly labeled and nothing is expired. I check dates at the start of every hiking season.
10. Documentation
Something people forget constantly!
- Small first aid manual (even with training, I reference it sometimes)
- Emergency contact information for everyone in the group
- Any relevant medical history or allergies
- Small waterproof notepad and pencil for documenting injuries
This documentation has helped me stay calm and systematic during actual emergencies instead of just panicking and forgetting important steps.
Breaking your kit into these ten categories makes everything more manageable. You can check each category before trips, organize supplies in separate bags or color-coded pouches, and you’ll actually be able to find what you need when seconds count.
It’s not about having the biggest kit—it’s about having the right stuff organized in a way that actually works when you need it most.
Building Your Kit: Pre-Made vs. DIY Options
So you’re convinced you need a proper hiking first aid kit. Great! Now comes the big question: do you buy a pre-packaged kit or build your own from scratch?
I’ve done both. Made mistakes with both. And I’ve got opinions. 😂
When I first decided to upgrade from my useless bathroom kit, I went straight to MEC. Grabbed a pre-made wilderness first aid kit off the shelf. It was like $60, came in a nice red pouch, and had “everything I needed” according to the label.
I felt so prepared walking out of that store!
Here’s the truth about store-bought kits: They’re convenient as hell and generally pretty decent. The big outdoor retailers in Canada—MEC, Canadian Tire, Atmosphere, even Costco sometimes—carry first aid kits specifically marketed for hiking and camping. These kits are designed by people who actually know what wilderness medicine requires. They save you the time of sourcing individual items.
The pros are obvious:
- Everything in one purchase
- Pre-organized in a decent case
- No hours spent researching what you need
For beginners or people who just want something functional without overthinking it? A quality pre-made kit is a solid choice.
But—and this is a big but—most pre-packaged kits are missing stuff or have too much of things you don’t need. The $60 MEC kit I bought had like 40 adhesive bandages but only two gauze pads. No moleskin at all. Which is insane for a hiking kit! The medications included were minimal. No blister-specific treatment beyond basic bandages.
The biggest issue? They’re generalized. Designed to appeal to the widest possible audience. They don’t account for your specific needs, hiking style, trip duration, or regional considerations.
Building a DIY kit takes more time but gives you total control. You choose every single item based on your actual needs. You’re not paying for stuff you’ll never use. And you’re not skimping on categories that matter to you.
Plus, the process of selecting items teaches you what everything does and why it’s important. Makes you more prepared to actually use the kit in an emergency.
Where to source DIY supplies in Canada:
- Shoppers Drug Mart: Most basic first aid supplies at reasonable prices
- Amazon.ca: Everything imaginable, usually cheaper than retail
- MEC/Atmosphere: Great for outdoor-specific items like moleskin or emergency blankets
- Canadian Tire: Camping section has solid options
- Costco: Occasionally has bulk first aid supplies at ridiculous prices
Cost comparison is interesting. A decent pre-made wilderness first aid kit in Canada runs between $40-$100 depending on size and brand. Building your own from scratch? Likely $60-$120 initially, but you’re getting exactly what you want in the quantities you actually need.
Over time, DIY becomes cheaper because you’re just restocking individual items rather than buying new kits.
Here’s my recommendation based on experience:
Brand new to hiking and overwhelmed? Buy a mid-range pre-made kit ($60-$80) from a reputable outdoor retailer. Then customize it by adding the stuff it’s missing. This hybrid approach gives you a solid foundation while teaching you what you actually need.
More experienced or already have first aid knowledge? Build your own. Make a detailed list organized by those ten categories I mentioned earlier, then spend an afternoon sourcing everything.
Budget-friendly options definitely exist without compromising safety:
- Generic brands work fine for most supplies
- Buy medications in larger quantities and repackage them
- Use Ziploc bags instead of fancy organizational pouches initially
- Buy ibuprofen in bulk bottles from Costco, then put 20-30 pills in a small labeled container for your kit (way cheaper than tiny travel packs!)
Whether you buy or build, the most important thing is knowing what’s in your kit and how to use it. I’ve seen hikers with $200 custom first aid kits who couldn’t find anything in an emergency because they’d never actually looked through it.
Meanwhile, someone with a basic $50 kit who’s organized and trained can handle most situations way better.
Start somewhere—pre-made or DIY—and evolve your kit as you gain experience. Pay attention to what you use most often, what you never touch, and what you wish you’d had. Your first aid kit should grow and change with your hiking experience.
There’s no one perfect solution that works for everyone.
Organizing and Maintaining Your First Aid Kit
Alright, so you’ve got all the right supplies. Awesome!
But here’s where a lot of people mess up—they just throw everything into a bag and call it a day.
Then when someone’s actually bleeding or hurt? They’re frantically dumping out the entire kit trying to find what they need while precious minutes tick by.
I learned this the embarrassing way during a day hike. My friend sliced his hand pretty badly on a sharp rock. I’m standing there unpacking my entire first aid kit onto a boulder, tossing aside moleskin and medications and random stuff, desperately hunting for gauze pads.
It took me like three minutes to find what I needed. The whole time he’s standing there holding his bleeding hand looking at me like “seriously dude?”
Organization is just as important as having the right supplies. Your first aid kit needs to be set up so you can find critical items in seconds, even if you’re stressed, tired, or dealing with an emergency in less-than-ideal conditions.
The first thing I did after that incident? Invested in proper waterproofing. Canadian weather is unpredictable as hell, and wet first aid supplies are basically useless or ruined.
I use a combination of:
- Waterproof dry bags
- Heavy-duty Ziploc freezer bags
- A waterproof hard case for the whole kit
My main kit lives in a dry bag—one of those roll-top ones that’s actually waterproof, not just water-resistant. Inside that, I’ve organized supplies into separate Ziploc bags by category.
All the wound care stuff goes in one bag. All the blister supplies in another. Medications in a third. And so on.
This way, if I need blister treatment, I grab that one bag instead of sorting through everything.
Color-coding changed my life, honestly.
I bought different colored stuff sacks from MEC:
- Red for wound care
- Blue for medications
- Green for blister care
- Yellow for sprains and strains
Now I can identify what I need at a glance without reading labels or thinking too hard. When someone’s hurt and you’re stressed, that visual system is way faster than anything else.
Some people use clear Ziploc bags so they can see contents without opening them. Also works great! The key is having some system that makes sense to you and that you’ll actually maintain.
Keeping frequently-used items accessible is crucial. Blister supplies and basic wound care should be in outer pockets or right at the top of your kit because you’ll use them constantly.
My most-accessed items are literally in a small pouch attached to my hip belt. I don’t even need to take off my pack! It’s got:
- A few adhesive bandages
- Moleskin
- Leukotape
- Pain reliever
The less-common items like emergency blankets, SAM splints, or serious trauma supplies can go deeper in your pack. You need them to be accessible, but they don’t need to be grab-and-go like blister treatment does.
Checking expiration dates sounds boring but it’s essential. I set a reminder on my phone for the start of every hiking season to go through my entire kit.
Medications expire. Adhesives lose their stickiness. Sterile items can become compromised if their packaging gets damaged.
I learned this when I tried to use antiseptic wipes that had dried out completely because the packages had tiny tears. They were useless—just dry pieces of paper.
Now I squeeze-check all my wipes and alcohol pads periodically to make sure they’re still moist.
Restocking after trips is something I forget constantly, but I’m trying to build a better habit. As soon as I get home from a hike, I go through the kit and replace everything I used.
Even if I only used two bandages? I replace them immediately so the kit is always ready for the next adventure.
I keep a running list on my phone of what needs restocking. If I use the last of my moleskin on a trip, I add it to the list right then so I don’t forget.
The worst feeling is starting a new hike and realizing you’re missing something you used on the last trip and forgot to replace. I’ve been there. It sucks.
Seasonal adjustments make a huge difference.
My summer kit is lighter and focuses more on:
- Heat-related issues
- Sun protection
- Insect problems
My spring and fall kits have extra layers of blister prevention because my feet tend to get wetter in those seasons.
Winter hiking gets a whole different approach:
- Hand warmers
- Extra emergency blankets
- Supplies for dealing with potential frostbite or hypothermia
I don’t maintain completely separate kits for each season—that would be too expensive and complicated. Instead, I have one core kit that stays consistent, and I add or subtract specific items based on the time of year.
Storage between adventures matters too. I keep my first aid kit in a cool, dry place at home. Not in my car where temperatures fluctuate wildly. Not in a damp basement where moisture can get into supplies.
I also keep the kit fully assembled and ready to go rather than disassembling it between trips. This means I can grab it and head out without spending an hour reorganizing everything.
Annual complete kit overhauls are part of my routine now. Once a year, usually in spring before hiking season really kicks off, I dump out everything and start fresh.
I check expiration dates on everything. Throw out anything compromised or old. Clean the bags and containers. Restock anything that’s running low.
This is also when I evaluate whether my organizational system is still working or if I need to adjust. Maybe I realize I never use certain supplies and can remove them to save weight. Maybe I’ve noticed I’m running out of something constantly and need to carry more.
The annual overhaul is when I make those adjustments.
The bottom line? Organization and maintenance are ongoing responsibilities, not one-time tasks. A well-organized, properly maintained hiking first aid kit is way more valuable than a fancy expensive kit that’s disorganized, outdated, or missing critical supplies.
Spend the time to set up a system that works for you, then commit to maintaining it. You’ll be way more prepared when it actually matters.
Conclusion
Building the perfect hiking first aid kit isn’t about hauling a pharmacy into the backcountry—it’s about smart preparation that matches your adventures.
From basic bandages to wilderness-specific supplies, every item in your kit serves a purpose when you’re hours away from help on Canada’s incredible trails. Remember, the most expensive first aid kit in the world is worthless if you don’t know how to use it. Pair your well-stocked supplies with proper training!
Start by assembling your core foundation with the ten essential categories, then customize based on your typical hiking conditions, group size, and trip duration. Check those expiration dates. Restock after every adventure. Adjust seasonally for Canadian weather extremes.
Don’t wait until you need it to realize what’s missing. Take an hour this weekend to build or upgrade your hiking first aid kit. Consider enrolling in a wilderness first aid course to maximize your preparedness.
Your future self (and your hiking buddies) will thank you when a minor injury stays minor because you were prepared.
Now get out there and explore those trails with confidence—you’ve got this covered!